Part 1 - Setting up Virtual Environment and Installing Windows Server 2012 RC
Download the VirtualBox from https://www.virtualbox.org and download the software by clicking on the link as I mentioned in below image red line box.
Make sure that you have downloaded VirtualBox extension pack.
Now execute the installer and follow the wizard by clicking on Next..Next..Next. Then install extension pack.
Now start VirtualBox and click on New button.
Follow the wizard and give name as SharePoint 2013, Operating System as “Microsoft Windows” and version as Windows 8 (64 bit) then click on Next.
As I have 8 GB RAM, so I have allocated 4096 (4 GB) RAM, you can setup as per your machine configurations. Now click on Next.
Select Create new Hard disk and click on Next.
Lets go with VDI and click on Next.
Select “Dynamically Allocated”. This allows your image auto grow as needed. Click on Next.
Select the size of disk as 60,55 GB, this we can re-size the image later using VBoxManage utility. Click Next.
Review the summary and click on Create.
You will notice that a clean image has been created. Please review the information which display on right hand side area.
Click on System Tab and then select Processor Tab. As I have 16 cores, so I have assigned 8 cores. Click OK to save.
Now click on start and First Time Wizard pop-up dialog will appear then click on Next.
Select the location of downloaded Windows Server 2012 RC Image. Click on Next
Review the Summary and click on Next.
Now Image will start, set up your language, Time/Currency format and Keyboard format. Click on Next
Click on Install Now
Select the 2nd Option and click on Next.
Accept the License Agreement and click on Next.
Select 2nd option as mentioned below in Red Line Box.
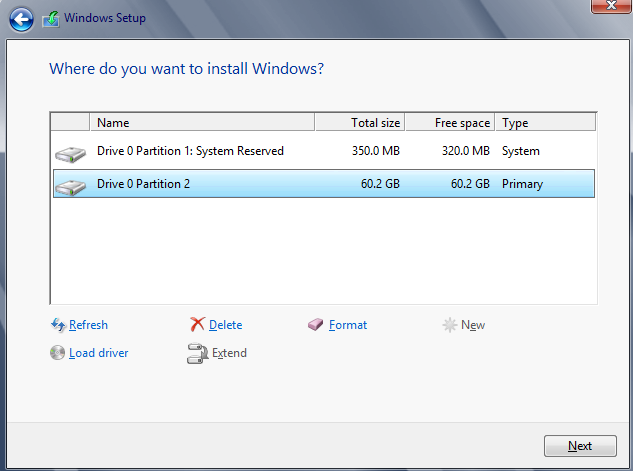
Here you have noticed that in the next screen you will see the 60.5 GB un-allocated disk drive (which we have created during image creation in VirtualBox previously). Now click on Drive Options
Click on New
Click on Apply.
Click on OK.
Installer created two partitions. One is System reserved and another one where OS will be installed. Click Next
Installation is started.
Installation will go step by step until it is finished.
Now enter your password for your Administrator a/c. Click on Finish.
For login your windows environment using Ctrl + Alt + Delete to your VM. This can be done from “Machine” in the menu option of VirtualBox.
Enter you Administrator a/c password which you entered earlier.
After login you will get the Server Manager Welcome screen. Now we have VM with Windows Server 2012 RC installed.
Now your Windows Server 2012 is ready.